System Flashing
Flash the firmware
Download Firmware from:lowpower_camera.zip
Info
- Main controller chip:ESP32-S3
- Development framework:ESP-IDF v5.1.6
Official reference documentation:ESP-IDF v5.1 Programming Guide
Recommended Flashing Methods
1. Flashing with VSCode Plugin (Recommended)
- Provides integrated code editing, compilation, and flashing features
- For environment setup, please refer to:Development Environment Setup Guide
2. Flashing Tool
You can download the flashing tool here:flash_download_tool_3.9.3_0.zip
Serial driver download from:CH341SER.EXE
Flashing Steps:
-
Install the serial driver and launch the flashing tool.
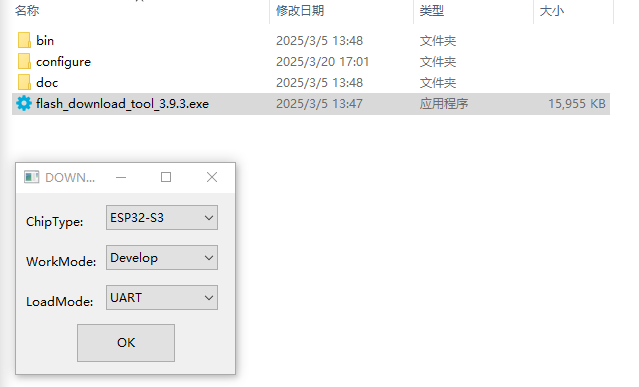
-
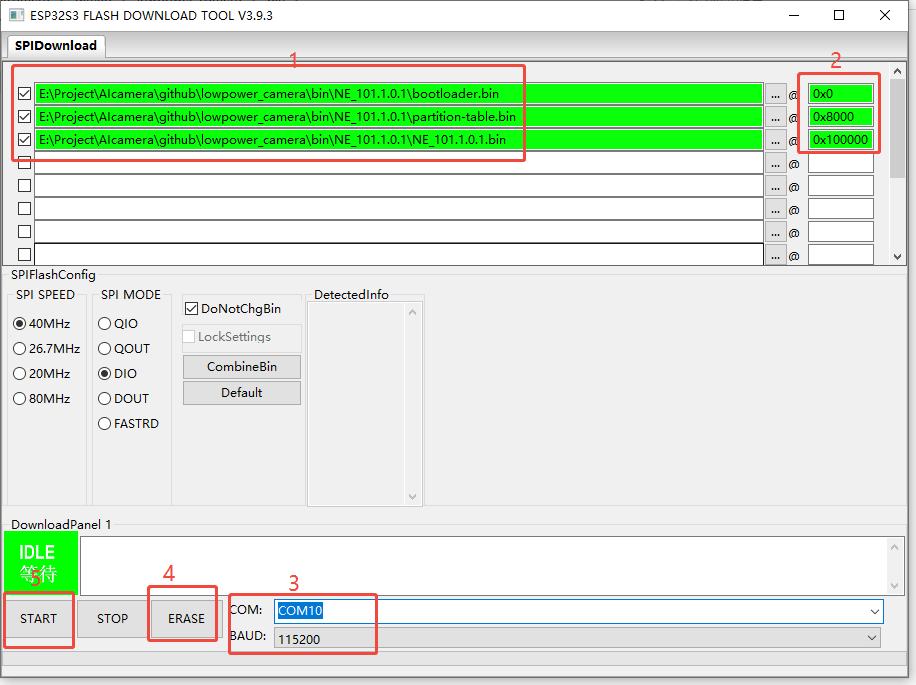
Configure Flashing Parameters:
- Select firmware files
- Set the flash addresses
- Choose the COM port
-
Execute Flashing:
- Click ERASE to wipe the chip at first
- Then, click START to flash
- Press the reset button or reconnect the USB power to reboot the device
OTA Firmware Updates Guide
Getting Start
-
Enter Configuration Mode
- Press and hold the device button to enter configuration mode.
- Connect to the device Wi-Fi hotspot(SSID:
NE101_XXXXXX)
-
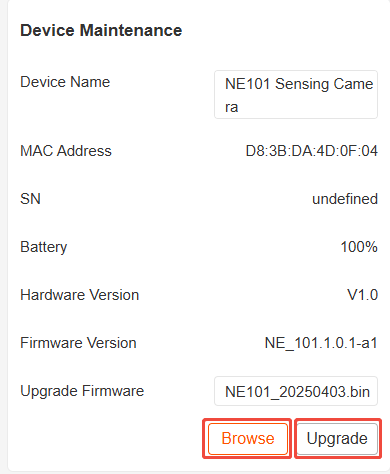
Upgrade the Firmware Package
- Access the device web interface at(http://192.168.1.1)
- Navigate to Device Maintenance → Firmware Upgrade
- After clicking the
Browseto select the firmware package, clickUpgradeto upload it.
-
Wait for the Upgrade to Complete
- The system will automatically verify and install the new firmware
- After the upgrade is completed, the Wi-Fi will reconnect automatically

-
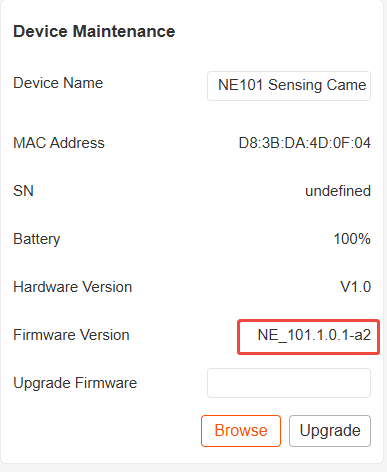
Verify Version Information
- Check the new firmware version on the Device Maintenance page
- Confirm that all functional modules are operating correctly
Notes
- Ensure stable power supply during the upgrade process
- It is recommended to back up important configurations before upgrading
- If the upgrade fails, the device will automatically roll back to the last available version
- The complete upgrade log can be viewed through the serial monitor